How to Install Starlink on a Boat: Marine Mounting Best Practices
By InstallPros Team · July 17, 2026 · 8 min read
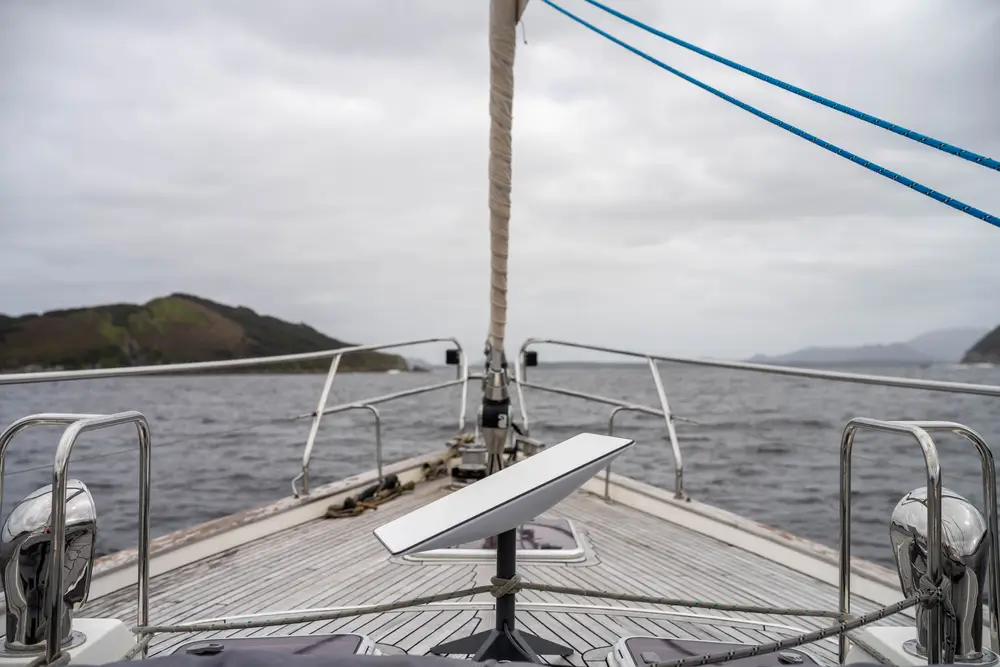
If you are researching how to install Starlink on boat, the biggest thing to understand is that marine installs are not just a normal roof mount moved onto fiberglass. Boats flex, vibrate, take spray, sit in salt air, and rarely have a perfect cable path from the mount to the network gear. A good Starlink boat installation starts with a stable mounting location, a clear view of the sky, protected cable routing, and a power setup that matches how you actually use the vessel. We have seen excellent results on center consoles, cruisers, trawlers, houseboats, and commercial vessels, but the details matter. A dish mounted too low, too close to radar, or on a flimsy rail can create dropouts that look like a service problem when the real issue is installation. This guide covers the best practices we use in the field so you can plan a clean, durable Starlink setup for dockside Wi-Fi, coastal cruising, or business operations on the water.
How to Install Starlink on Boat: Start With the Right Location
The first decision is where the Starlink antenna will live. On a boat, height helps, but only if the mount is solid and the cable can be routed safely. The dish needs a wide, unobstructed view of the sky. Masts, outriggers, radar domes, hardtop frames, antennas, and even a flybridge can block enough signal to cause short interruptions.
We usually look for a position on a hardtop, radar arch, mast platform, upper deck, or purpose-built marine pole. The goal is to keep the antenna above nearby metal and canvas without putting it where people grab it, bump it, or use it as a handhold. Avoid low rail locations when possible because passengers, dock pilings, and cabin structures can become moving obstructions.
Before drilling anything, power up the system temporarily and check for obstructions from the planned area. Boats change heading constantly, so the antenna needs a clean view in every direction, not just one compass bearing. A location that works at the dock may perform poorly once the boat swings at anchor.
Marine Mounting Best Practices for a Stable Starlink Install
A marine Starlink mount has to handle vibration, shock loading, wind, and corrosion. Standard light-duty brackets may hold at the dock but loosen after repeated chop. Use a mount designed for marine or heavy outdoor use, and through-bolt it whenever the structure allows. Screws into thin fiberglass or coring are not enough for a long-term install.
For fiberglass hardtops, we typically use backing plates or large fender washers to spread the load. Seal every penetration with the correct marine sealant, and avoid crushing the laminate by overtightening. On aluminum arches or towers, use stainless hardware with proper isolation where dissimilar metals are involved to reduce corrosion.
- Use stainless hardware: Cheap fasteners rust quickly in salt air.
- Add backing support: A wider load path reduces cracking and flex.
- Keep the dish level and rigid: Movement can cause performance issues.
- Plan service access: The antenna should be reachable for inspection.
If the boat runs offshore or at higher speeds, do not guess on mount strength. Wind force and wave impact can be far greater than what a backyard-style mount was designed to handle.

Cable Routing, Waterproofing, and Strain Relief
Cable routing is where many boat installs fail. The cable should never be pinched under hardware, bent sharply, dragged across a rough edge, or left hanging where it can whip in the wind. On a boat, movement is constant, so strain relief is just as important as keeping water out.
Use a proper marine cable gland or deck fitting where the cable enters the cabin or electronics area. The fitting should match the cable size and be sealed carefully. Do not rely on silicone smeared around an oversized hole. That kind of shortcut usually leaks later and can damage headliners, electronics, or core material inside the deck.
Route the cable along protected paths, following existing wire chases where practical. Keep it away from high-heat engine spaces, sharp metal edges, moving hinges, and places where gear gets stored. Leave a drip loop before entry points so water does not run straight into the fitting.
Label the cable and leave enough service slack near the router or power supply. A clean route makes troubleshooting easier and prevents accidental damage when other marine electronics are serviced.
Power and Network Setup on a Boat
Starlink equipment needs reliable power, and boats often have multiple power scenarios: shore power at the dock, inverter power underway, house batteries at anchor, or generator power on larger vessels. Before installing, confirm how the system will be powered during normal use and whether the circuit can support the load without nuisance shutdowns.
Many owners want the router inside the cabin for better protection, with Wi-Fi coverage extending through the cockpit or deck. Placement matters. Bulkheads, metal surfaces, tinted glass, and engine rooms can reduce Wi-Fi range. In larger vessels, one router location may not cover every berth, salon, and bridge area. A wired network or marine-grade access point layout may be needed.
Use clean power and avoid plugging critical communications into a loose outlet or overloaded strip. Secure the power supply and router so they do not slide, vibrate, or get exposed to spray. If the system will be turned off regularly, make sure the crew knows the startup sequence and where the equipment is located.
For commercial vessels, charter boats, or liveaboards, we recommend documenting the circuit, cable route, and reset procedure. It saves time when someone needs service quickly.
Avoiding Interference, Obstructions, and Performance Problems
Starlink performs best when the antenna has clear sky and stable mounting. On boats, the most common performance complaints come from partial blockage, not bad equipment. Radar arrays, satellite TV domes, mast hardware, outriggers, solar arches, and even stacked paddleboards can interrupt the signal if they sit in the antenna’s view.
Give the dish separation from radar and other transmitting equipment. Do not mount it directly in the sweep path of a radar array or tucked beside a cluster of antennas. Also consider future additions. If you plan to add solar panels, a second radar, or a dinghy davit, leave room so you do not box in the Starlink later.
Check performance in real conditions. Test at the dock, while turning, at anchor, and underway if that is how the boat will be used. A setup that looks clear from one angle may reveal blockage when the boat pitches or swings.
- Short dropouts can point to intermittent obstructions.
- Frequent disconnects may indicate cable, power, or router issues.
- Slow Wi-Fi in cabins may be a local network coverage problem.
When to Hire a Professional Starlink Boat Installer
A careful DIY owner can handle some simple Starlink boat installs, especially on smaller vessels with an easy mounting surface and a short cable route. But if drilling into a hardtop, sealing a cored deck, working near marine electronics, or tying into boat power is involved, a professional install is usually the safer choice.
InstallPros handles Starlink installations for homes, businesses, RVs, and boats. For marine work, the value is not just getting the dish attached. It is choosing a location that performs well, protecting the cable, keeping water out, securing equipment against vibration, and leaving the system serviceable.
A proper boat installation should look like it belongs on the vessel. No loose cable coils on deck, no unsealed holes, no shaky rail clamps, and no router sitting where it can get wet. The best installs are clean enough that they do not draw attention, but strong enough to handle real use.
If your boat supports work, charter guests, remote monitoring, or family connectivity, it is worth getting the installation right the first time.
Frequently Asked Questions
Can you install Starlink on any boat?
Starlink can be installed on many boats, including center consoles, cruisers, houseboats, trawlers, and commercial vessels, but the boat needs a suitable mounting location, safe cable route, and reliable power source. The biggest limitation is usually obstruction. If the only available location is blocked by a mast, radar, tower, or cabin structure, performance may suffer. Smaller boats can work well if the antenna is mounted securely and kept clear of passengers and gear. Before drilling, test the planned location and confirm the dish has a wide view of the sky.
Where is the best place to mount Starlink on a boat?
The best place is usually a rigid, elevated surface with a clear 360-degree sky view, such as a hardtop, radar arch, upper deck, mast platform, or dedicated marine pole. Avoid low rail mounts if people, dock structures, or cabin walls can block the antenna. The location also needs a practical cable path into the cabin or electronics space. A high mount is not automatically better if it flexes, vibrates, or puts the cable at risk. A stable, serviceable, obstruction-free location is the goal.
Does Starlink need to be waterproofed for marine use?
The outdoor antenna is designed for weather exposure, but the installation still needs proper marine waterproofing. Any hole through a hardtop, deck, or cabin wall should use a correctly sized marine cable gland or deck fitting and appropriate sealant. The router, power supply, and network equipment should be protected from spray, condensation, and standing water. Cable entry points are often the weak spot. A clean install uses drip loops, strain relief, sealed penetrations, and protected cable paths to prevent leaks and long-term damage.
Will Starlink work while the boat is moving?
Starlink service on a moving boat depends on the hardware, service plan, location, and how the vessel is used. From an installation standpoint, the antenna must be mounted securely enough to handle wind, vibration, and boat motion, with a clear view as the vessel changes direction. Performance can be affected by obstructions, heavy spray, power interruptions, or a mount that flexes. If you plan to use Starlink underway, design the installation for real operating conditions, not just dockside testing.
Should I hire a professional to install Starlink on my boat?
You should consider a professional installer if the job involves drilling into fiberglass, sealing a cored deck, mounting on a radar arch, routing cable through finished spaces, or integrating with boat power. Mistakes on a boat can cause leaks, corrosion, cable failure, or unreliable service. A professional Starlink boat installer will choose a strong mounting location, use proper marine hardware, protect the cable, and secure the router and power equipment. InstallPros offers