J Pole Mount Starlink Installation: Optimal Connectivity Solutions
April 29, 2024 · 3 min read
Introduction: Why Mount Choice Matters for Starlink
When deploying advanced satellite internet systems like Starlink, the mount you choose has a direct impact on signal reliability, long-term durability, and maintenance burden. The J Pole Mount is a popular solution that balances elevation, versatility, and aesthetics — but it’s not the only option. This guide from InstallPros.io expands on J Pole installation best practices, compares mount types, walks through a professional installation, and outlines roof vs. wall vs. pole trade-offs. If you’re evaluating a Starlink installation, read on for the practical information you need to make a confident decision.
Importance of Choosing the Right Mount for Starlink
Starlink dishes require a clear line-of-sight to the sky to maintain the best possible connection to the low Earth orbit (LEO) satellite constellation. Obstructions, reflections, or mounting instability can cause service interruptions, reduced speeds, and increased latency. The mount you select determines elevation, stability in wind, corrosion resistance, ease of alignment, and how discreet the installation will appear — all important factors for residential, commercial, and remote site installations.
The J Pole Mount Explained
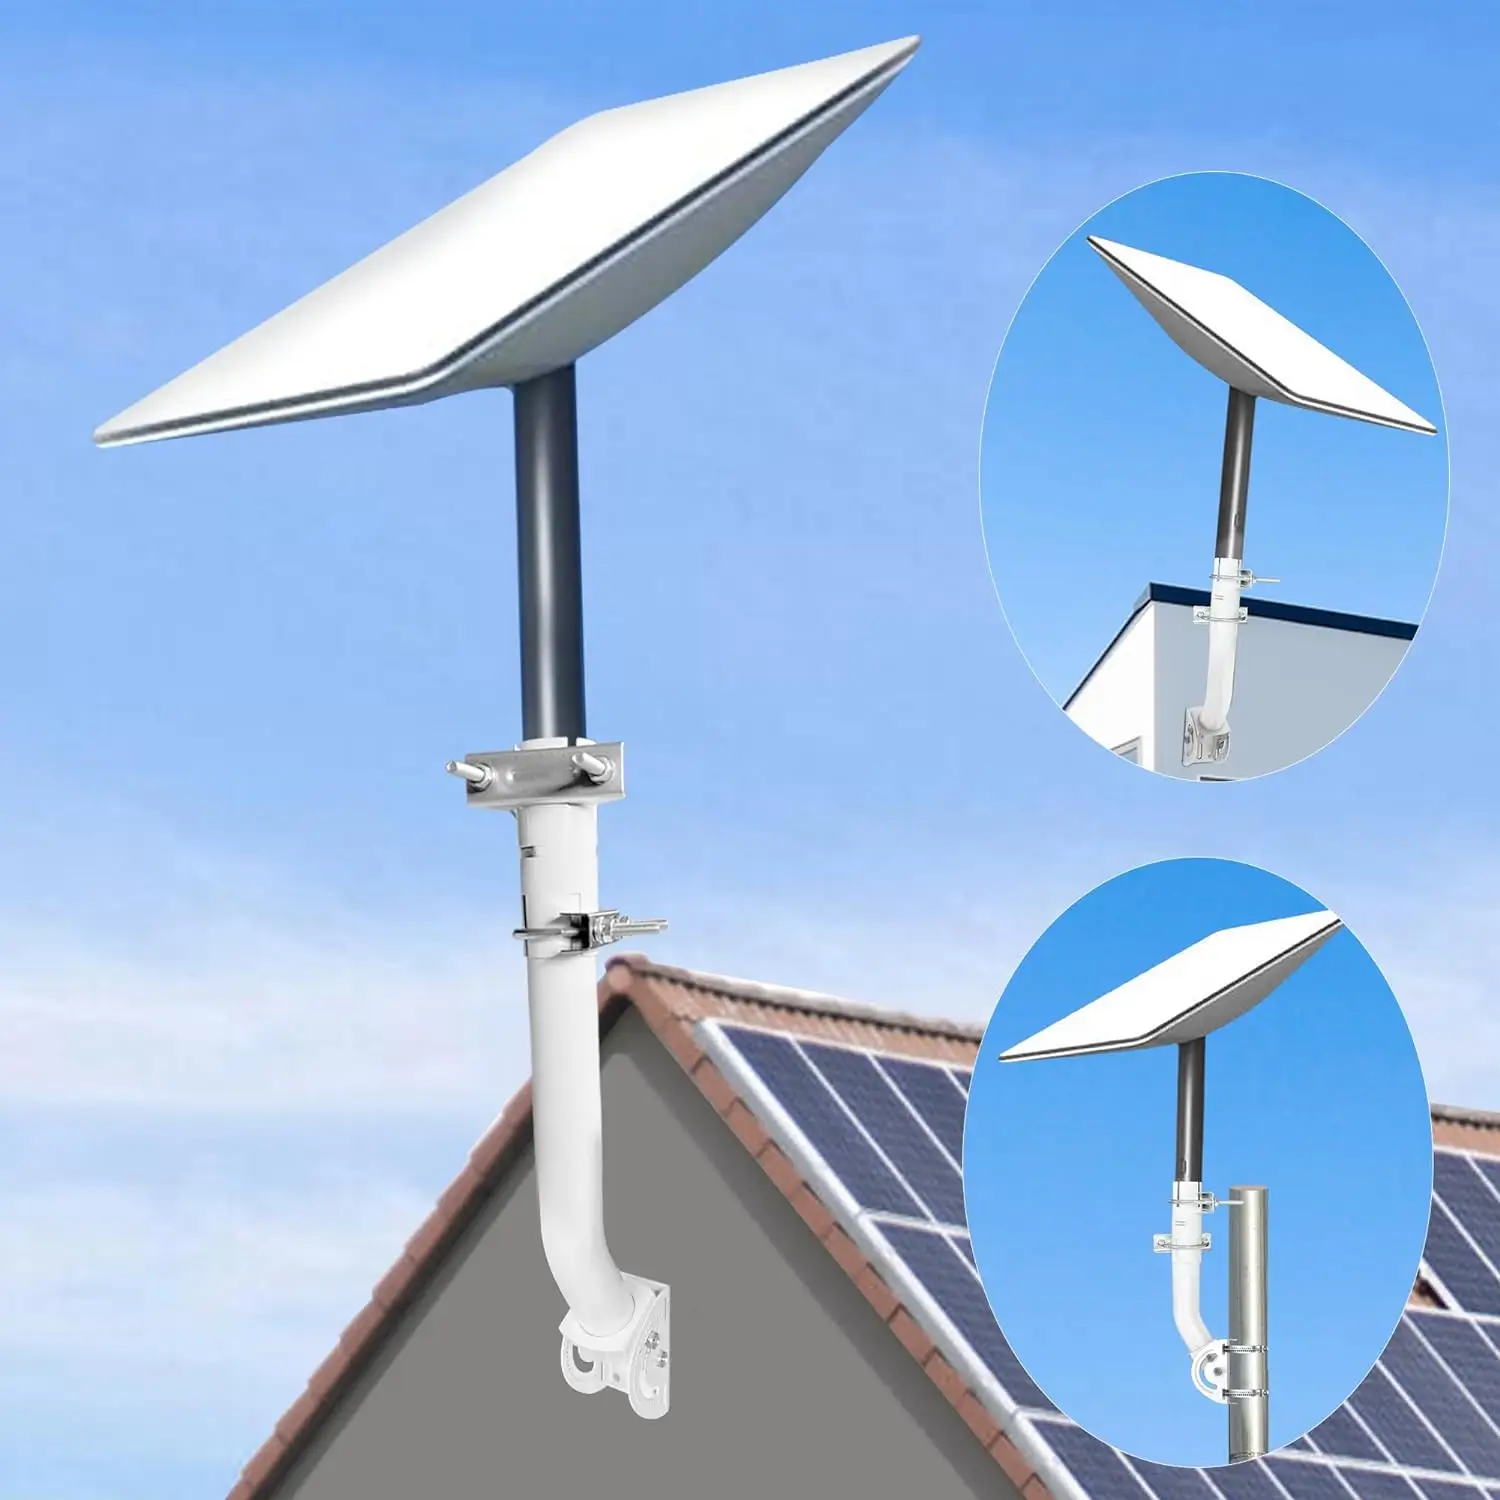
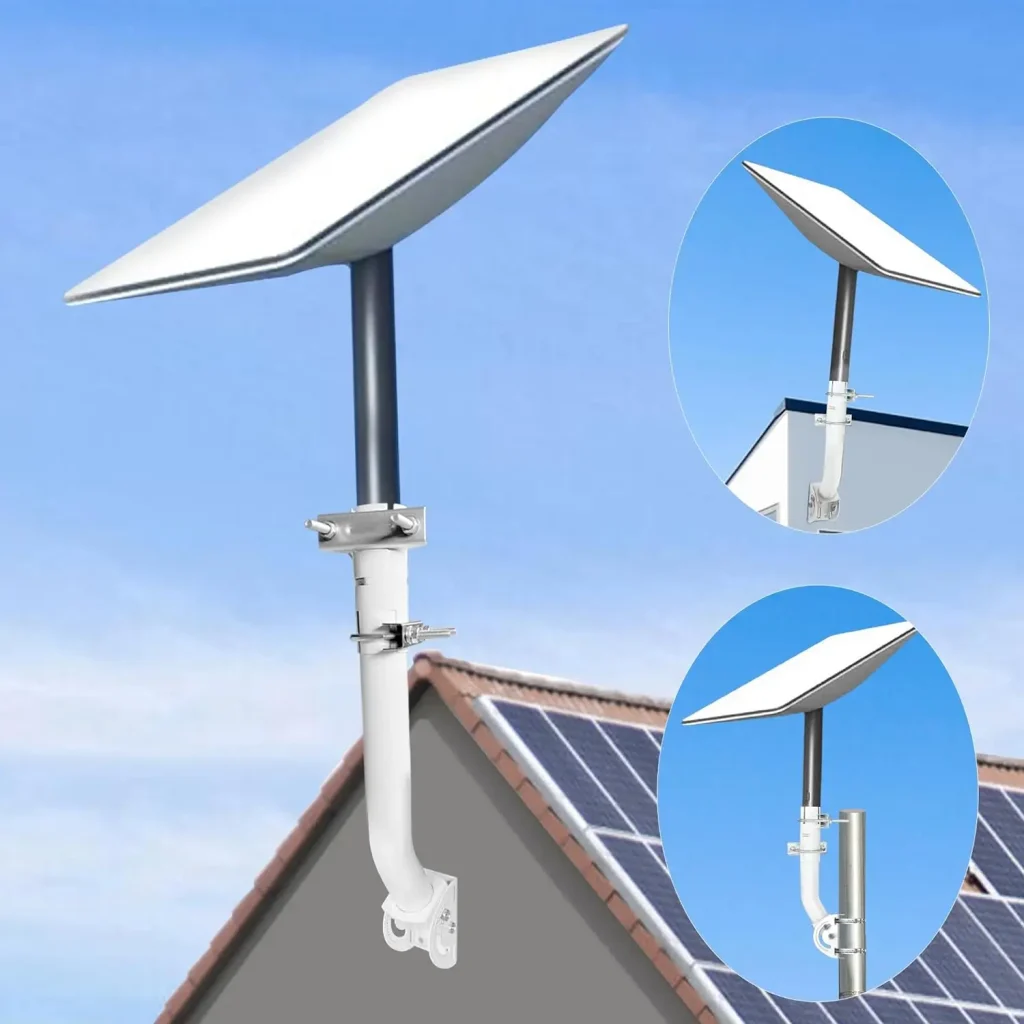
The J Pole Mount is named for its distinctive "J-shaped" profile. It provides a vertical rise with an offset bracket that allows the dish to be elevated while keeping the mounting point close to the structure. Key advantages include:
- Elevation and Clearance: Raises the dish above low obstructions such as fencing, HVAC equipment, or lower rooflines.
- Versatility: Can be adapted for roof, wall, or ground/pole mounting depending on bracket configuration and baseplate options.
- Durability: Available in galvanized steel or powder-coated aluminum to resist corrosion in coastal or high-humidity environments.
- Aesthetics: Offers a more streamlined profile than some bulky tripod mounts, and can be painted to match the building facade.
Mount Types Comparison: Which Is Best for Your Site?
Choosing between mount types depends on site conditions, structural access, wind exposure, and aesthetic preferences. Below is a practical comparison of common mounts used for Starlink.
- J Pole Mount — Best when you need moderate elevation with a compact footprint. Good for roofs and walls. Easier to paint and weatherproof. May require guying for very tall pole lengths.
- Roof Tripod — Provides a stable base on low-slope roofs. Excellent wind resistance when properly weighted or anchored, but larger visual profile and requires careful roof penetration sealing.
- Wall Mount / Standoff Bracket — Ideal for side-of-house installations where roof access is limited. Keeps the dish vertical and reduces roof penetrations but can be more visible from ground level.
- Pole with Clamp / U-Bolt Mount — Mounts directly to an existing vertical pole (utility or mast). Very flexible for height adjustments; consider wind loading and pole stiffness.
- Ground Mount / Portable Pole — Useful for temporary deployments, RVs, or where roof and wall installations are impractical. Susceptible to obstructions and typically lower elevation.
- Chimney Mount — A compromise for some homes; less common due to chimney stability and potential to void roof/chimney warranties.
- Permanent Roof Flange — Best for the most permanent, low-profile installations. Requires precise flashing and sealing to avoid leaks.
Installation Walkthrough: J Pole Mount for Starlink
Installations should follow local building codes and manufacturer guidance. Below is a professional-level walkthrough used by InstallPros technicians. If you’re not confident working at height or with electrical grounding, hire a licensed installer.
- Step 1 — Site Survey and Line-of-Sight Check: Inspect the property to find a location with an unrestricted sky view. Use Starlink’s app or a sighting tool to confirm azimuth and elevation clear of trees, chimneys, and nearby structures. Consider seasonal foliage and future tree growth.
- Step 2 — Choose Mount Height and Base: Determine the pole length and baseplate required. For rooftop J Poles, select a flange plate or weighted tripod base sized for roof pitch and structural rafters. For wall installations, ensure studs or masonry anchors are available.
- Step 3 — Secure the Mount: Fasten the J pole to the chosen base with corrosion-resistant bolts. On rooftops, attach to rafters or roof trusses using lag bolts and a properly installed flashing kit. On walls, use heavy-duty through-bolts or toggles depending on material. Verify vertical plumb with a level.
- Step 4 — Mount the Dish and Align: Attach the Starlink dish to the pole bracket per manufacturer torque specs. Power up the dish and use the Starlink app to perform the initial alignment and update firmware. Fine-tune the mounting orientation to maximize the unobstructed sky footprint.
- Step 5 — Cable Routing and Weatherproofing: Run the coax/PoE cable through the shortest practical path to the indoor terminal. Use UV-rated conduit or pipe where exposed. Seal roof or wall penetrations with high-quality flashing and silicon or polyurethane sealant. Install drip loops to prevent moisture ingress.
- Step 6 — Grounding and Surge Protection: Bond the J pole and dish to a grounding electrode system with appropriately sized copper conductor (per NEC or local code). Install surge protective devices at the outdoor entry and at the equipment rack if required. Proper grounding is essential for safety and equipment longevity.
- Step 7 — Wind and Vibration Mitigation: For poles taller than 6–8 feet, consider guy wires or additional bracing. Use anti-vibration clamps and ensure all fasteners are tightened to spec. Inspect pole deflection under wind; reduce height or add stiffness if excessive.
- Step 8 — Final Inspection and Documentation: Test the Starlink connection under load, inspect all seals, and provide as-built photos and documentation. If necessary, apply a protective paint or powder coat to match aesthetics and add an extra layer of corrosion resistance.
Tools and Materials You’ll Need
A professional install kit typically includes the following tools and materials. If you’re hiring InstallPros, technicians will arrive fully equipped.
- Hand Tools: Adjustable wrenches, socket set, screwdrivers, hex keys (for dish hardware).
- Power Tools: Cordless drill, right-angle drill for tight spaces, hammer drill and masonry bits for brick or concrete anchors.
- Fasteners and Anchors: Galvanized lag bolts, stainless steel machine bolts, masonry anchors, locking nuts, and washers.
- Sealing and Flashing: Roof flashing kit, marine-grade sealant, butyl tape, and flashing screws.
- Safety Gear: Fall protection harnesses, roof anchors, gloves, and eye protection.
- Grounding & Surge Protection: Grounding rod, clamp, copper conductor, and surge protective devices.
- Conduit and Weatherproofing: UV-resistant conduit, conduit straps, cable ties, and foam gaskets.
Roof vs. Wall vs. Pole: Pros and Cons
Selecting the mounting surface is often the most consequential decision:
- Roof Mounts: Pros — highest elevation, often best line-of-sight, more discreet from the street. Cons — requires roof penetrations and careful flashing; safety concerns for DIY installers.
- Wall Mounts: Pros — easier access for maintenance and alignment, fewer roof leaks to worry about. Cons — lower elevation may suffer from obstructions; more visible from the ground.
- Pole or Ground Mounts: Pros — flexible placement, minimal roof work, ideal for remote or mobile setups (e.g., fleet and RV). Cons — may require concrete footings, guying for wind, and may sit below tree lines or other obstructions.
Technical and Aesthetic Considerations
Beyond functionality, consider local aesthetics, HOA rules, and long-term wear. Paint or powder coat J poles to match roof shingles or siding, and hide cabling in conduit painted to match. Use stainless steel hardware in coastal regions to prevent rust stains. InstallPros recommendations also include scheduling routine inspections after extreme weather events to check mounting integrity and ground connections.
Why Choose InstallPros?
InstallPros.io is the #1 Starlink installer in the USA for residential, enterprise, fleet, and remote site installations. Our teams specialize in turnkey solutions — from initial site survey and permit support to professional mounting, code-compliant grounding, and interior network integration. We offer same-week scheduling in most markets and deploy certified technicians trained specifically on Starlink hardware and mounting systems. Whether you need a single-family home rooftop J pole, a multi-site enterprise rollout, fleet/RV connectivity, or ruggedized installations in remote locations, InstallPros delivers fast, compliant, and attractive installations with industry-leading warranties and documentation.
Maintenance and Long-Term Care
Once installed, maintenance is straightforward but important. Inspect all fasteners, seals, and grounding connections annually. Trim nearby foliage to preserve line-of-sight. After major storms, perform a quick visual check for loosened hardware or cable damage. Replace any corroded hardware promptly and reapply paint or protective coatings every few years in harsh environments.
Common Pitfalls and How to Avoid Them
Avoid these typical mistakes that can degrade Starlink performance or lead to premature hardware problems:
- Poorly Sealed Penetrations: Leads to water intrusion and interior damage — always use proper flashing kits and sealants.
- Undersized Grounding: Can create fire or equipment-damage risk — follow NEC or local code for conductor diameter.
- Insufficient Pole Stiffness: Excessive sway reduces alignment quality — use guying or a stiffer pole where required.
- Ignoring Line-of-Sight Over Time: Trees grow — schedule yearly reviews to ensure continued performance.
Conclusion
The J Pole Mount is a versatile, durable, and aesthetically flexible option for Starlink installations. When properly designed and professionally installed, it delivers excellent signal quality and long service life. Choosing the right mount type, following a methodical installation process, and working with an experienced installer like InstallPros can minimize risk and maximize uptime for your Starlink system.
FAQs
Can I install a J Pole Mount myself, or should I hire a professional?
DIY installation is possible for experienced homeowners, but a professional installation by InstallPros is recommended for safety, proper sealing of roof penetrations, correct grounding, and compliance with local codes. Professionals also ensure optimal alignment and provide documentation and warranty support.
How high should I place the J Pole for optimal reception?
There is no one-size-fits-all height; goal is to clear local obstructions and achieve a clean sky view. In residential settings, 4–8 feet above roofline is common. In heavily treed or flat areas, taller poles or alternative rooftop placements may be necessary. InstallPros performs a site survey to recommend the correct height.
Do I need additional lightning protection for a rooftop J Pole?
Yes. Proper grounding of the dish and pole to a grounding electrode and use of surge protection devices is essential. Lightning protection minimizes the risk to equipment and structure — InstallPros installs code-compliant grounding as part of every outdoor Starlink installation.
Will the J Pole affect my roof warranty?
Any roof penetration can potentially affect a warranty. InstallPros uses industry-standard flashing techniques and works with roofing contractors or provides documentation to minimize warranty impacts. We recommend checking your roof warranty and HOA rules before installation.
How long does a professional J Pole Starlink installation take?
Typical residential installations take 2–4 hours, depending on access, roof complexity, and grounding needs. Enterprise and remote-site installations may take longer due to permitting, additional structural work, or specialty equipment. InstallPros offers same-week scheduling in most areas and provides a time estimate during the site survey.